Quote, then job sheet, then invoice
Type the lines once. The quote becomes the job sheet, the job sheet becomes the invoice, and nothing is retyped.
Or click through it at your own pace
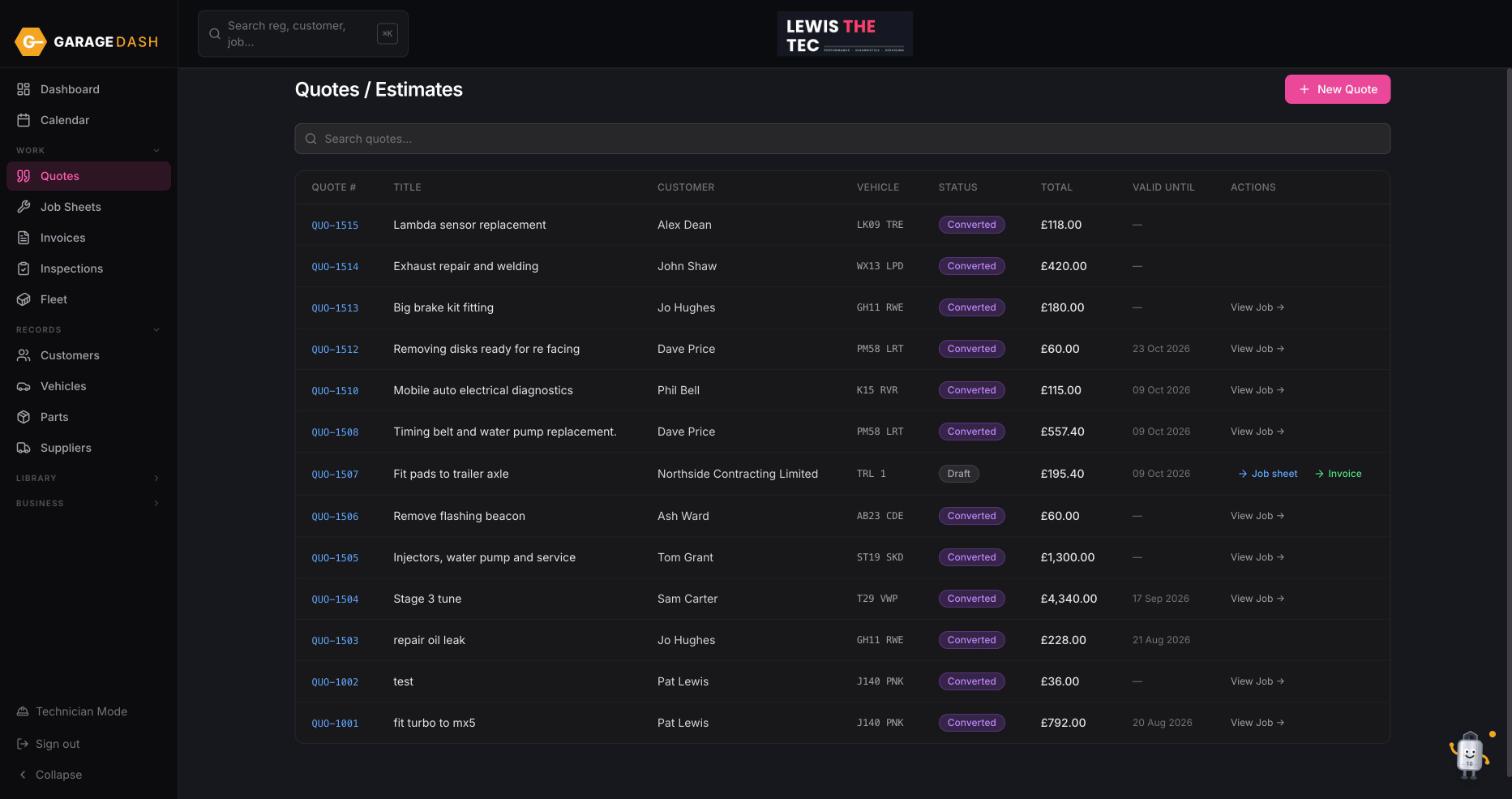
Go to Quotes and click New Quote
Click Quotes in the left menu, then New Quote top right.
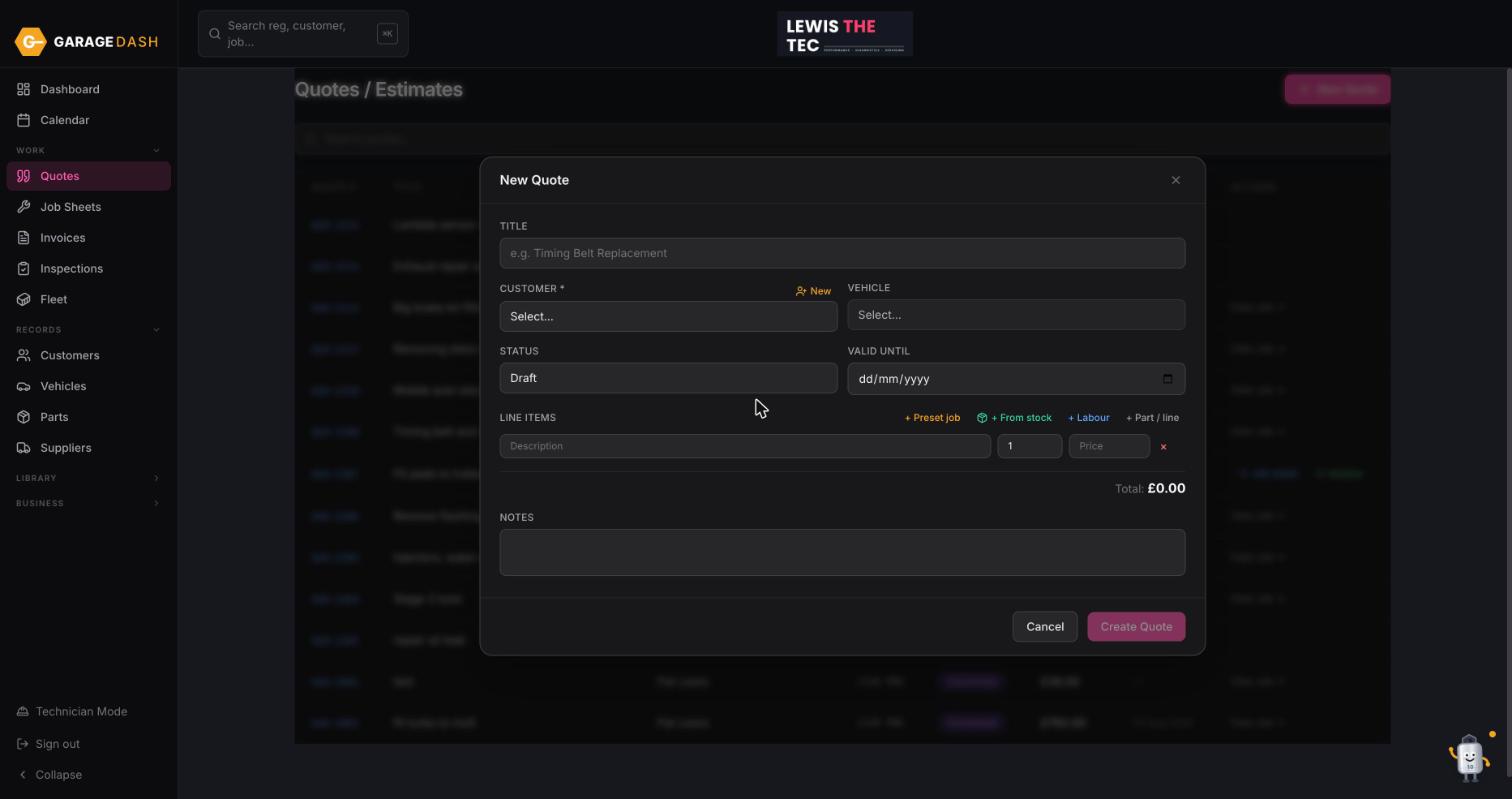
Add the lines: preset job, labour, part
Pick the Customer and Vehicle. Then build the lines: + Preset job drops in a job you have set up with its hours and parts, + Labour adds hours at your rate, + From stock pulls a part you hold, and + Part / line is a free line. Set a Valid until date and click Create Quote.
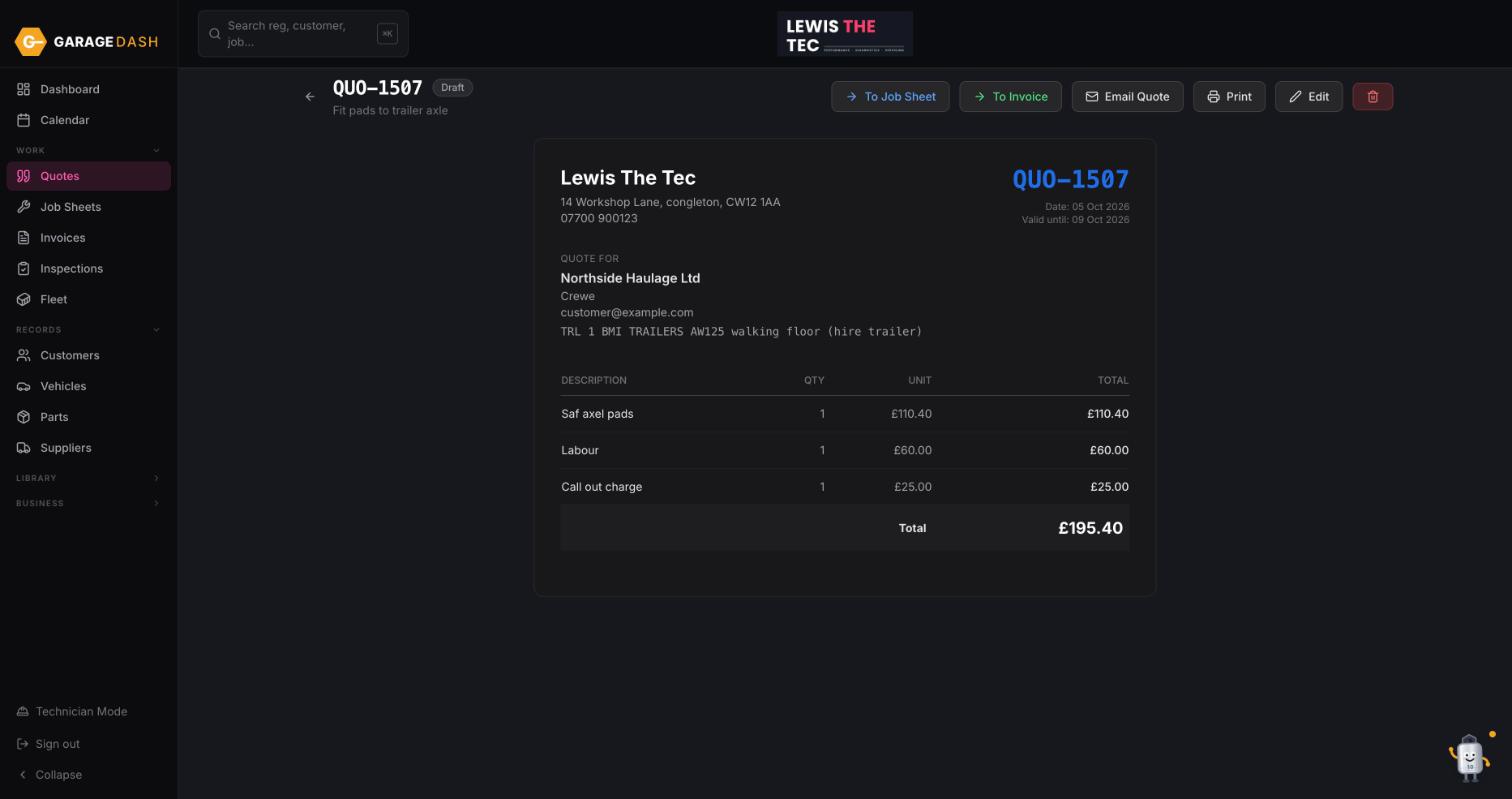
Email or print it, then convert it with To Job Sheet
The quote opens as the customer will see it. Email Quote sends it with your logo on. When they say yes, click To Job Sheet. Every line carries across. You can also jump straight To Invoice for a job you have already done.
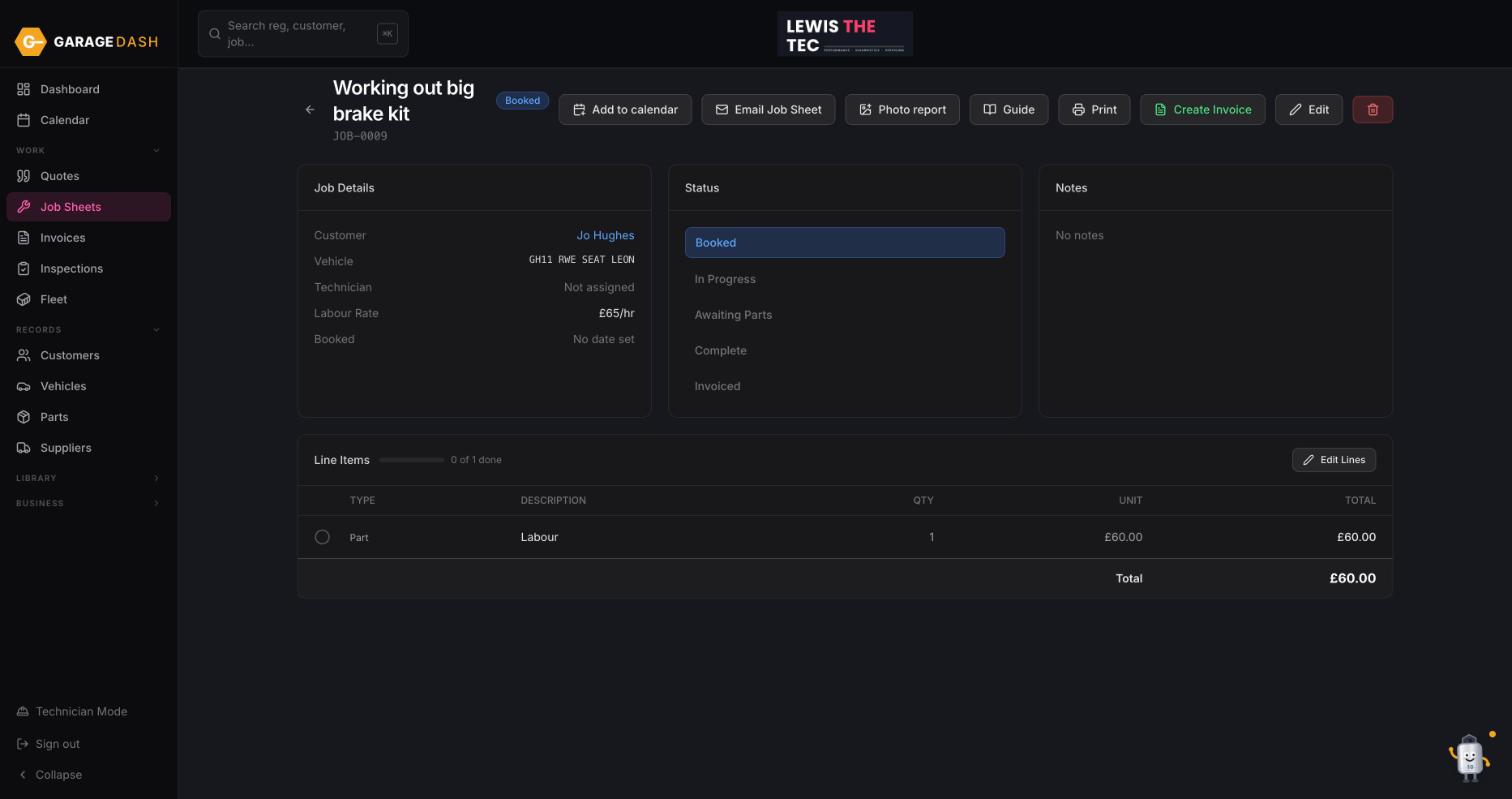
Work the job sheet
Tick each line as it is done, move the Status along, and use Add to calendar to put it in the diary. Photo report attaches pictures, Guide opens the repair guide for this car and job.
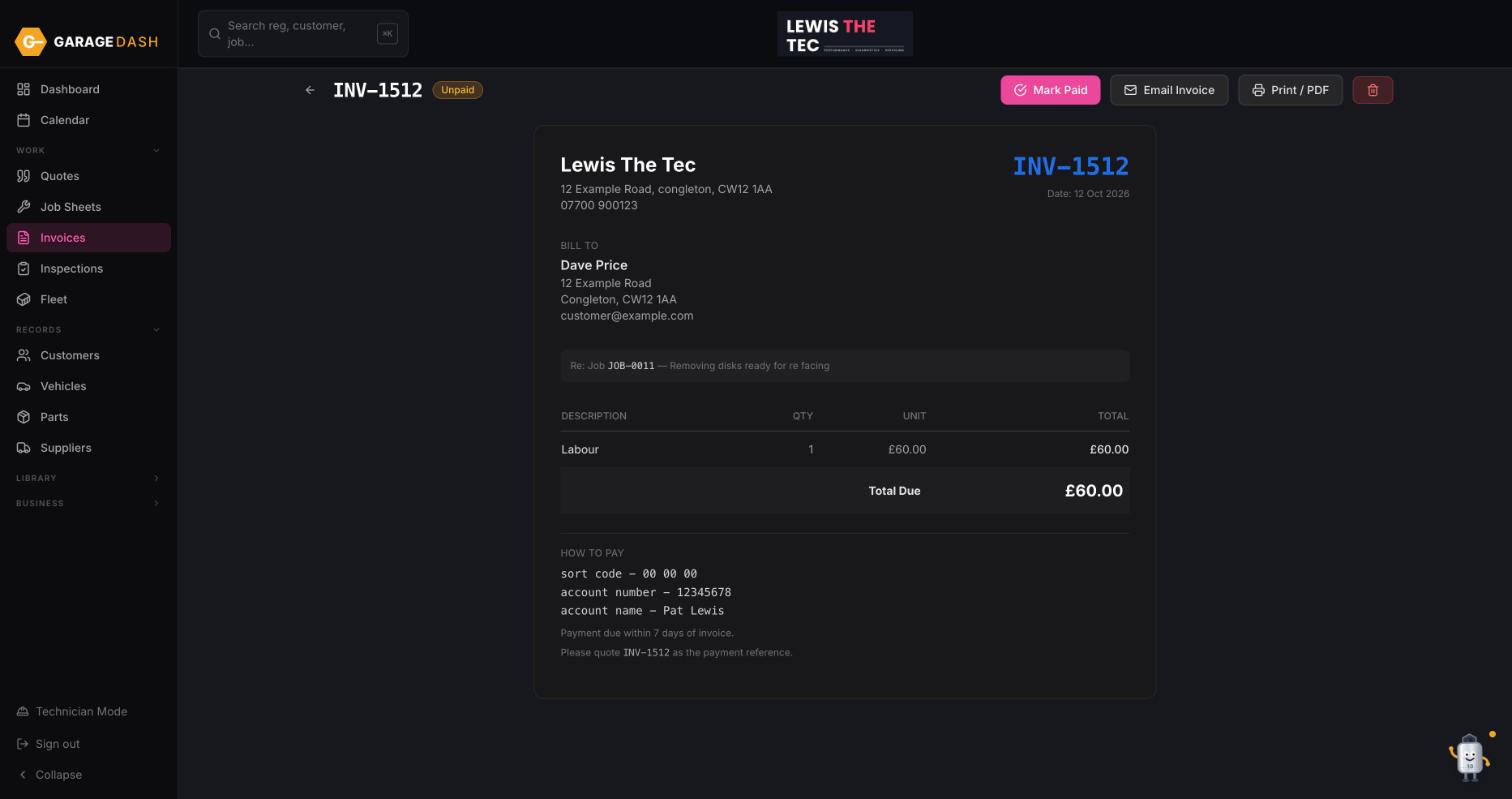
Click Create Invoice
When the job is complete, click Create Invoice on the job sheet. The invoice opens with the same lines, your bank details and payment terms from Settings. Email Invoice sends it, Print / PDF gives you a copy.
All the steps on one page
- Go to Quotes and click New Quote. Click Quotes in the left menu, then New Quote top right.
- Add the lines: preset job, labour, part. Pick the Customer and Vehicle. Then build the lines: + Preset job drops in a job you have set up with its hours and parts, + Labour adds hours at your rate, + From stock pulls a part you hold, and + Part / line is a free line. Set a Valid until date and click Create Quote.
- Email or print it, then convert it with To Job Sheet. The quote opens as the customer will see it. Email Quote sends it with your logo on. When they say yes, click To Job Sheet. Every line carries across. You can also jump straight To Invoice for a job you have already done.
- Work the job sheet. Tick each line as it is done, move the Status along, and use Add to calendar to put it in the diary. Photo report attaches pictures, Guide opens the repair guide for this car and job.
- Click Create Invoice. When the job is complete, click Create Invoice on the job sheet. The invoice opens with the same lines, your bank details and payment terms from Settings. Email Invoice sends it, Print / PDF gives you a copy.